Dispatch Display
Previous Topic  Next Topic 

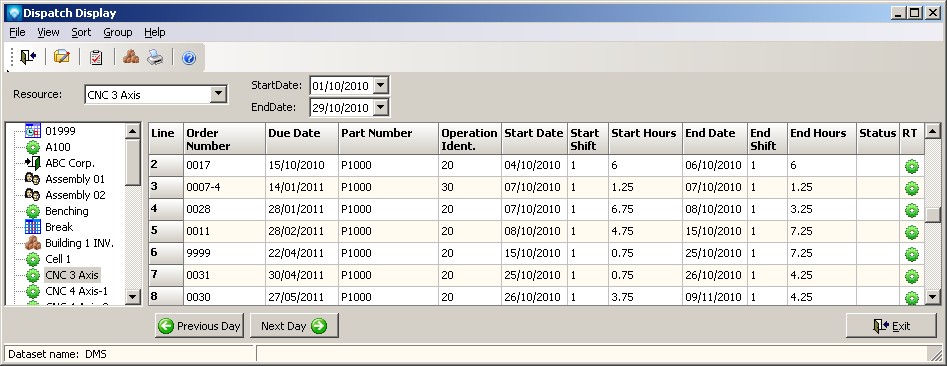
The Dispatch Display shows the work assign to a resource for a given time period.  The dispatch is independent of the selections made in Manufacturing Orders Job Grid.  When the Dispatch Display appears, the default start date and end date are set to the first day of the schedule and the first resource (sorted alphabetically) is displayed on the screen.  The columns displayed are set in the Dispatch Display Grid Selections.


The example below shows a dispatch display for the resource CNC 3 Axis starting on 01/10/2010 and ending on 29/10/2010:


You can resize the columns by positioning the mouse over the bar between the columns in the heading and drag the column to the desired with. 


Valid commands are:


  1. Start Date The start date defaults to the first day of the schedule .  A new start date can be entered.
  2. End Date  The start end defaults to the first day of the schedule .  A new end date can be entered.
  3. Resource A resource can be entered or selected from the Resource prompt or click on the resource tree to select a resource.
  4. Edit The current job's operations can be edited by selecting File | Edit job or by clicking on the edit icon .  Manufacturing Order Operations tab then displays the current job's operations.
  5. Update The current job can be updated using Job Status Updating by selecting File | Job Updating or clicking on the job updating icon .
  6. Quick Job Updating To select Quick Job Updating, use the right mouse button and click on an operation.
  7. Material Display  Selecting File | Material Display or clicking on the material icon will display the material for the job using Material Display
  8. Print  Selecting File | Print or clicking on the print icon will display a print dialog enabling you to print the information currently in the dispatch grid.
  9. Sort The Sort menu item enables you to change the sort order of the information displayed in the dispatch grid.  Valid sort selections are:
    1. Start Date
    2. Start Date + Previous Operation Status
    3. Previous Operation Status + Start Date
    4. Start Date + Current Status + Previous Operation Status
  10. Group  the Group menu item enables you to group resources into individual resources, Pools or Departments.  Grouping will display all resources dispatch under the group selected.  For example, if you select a grouping of pools and then select a pool from the resource tree, the dispatch for all resources within the pool is displayed.


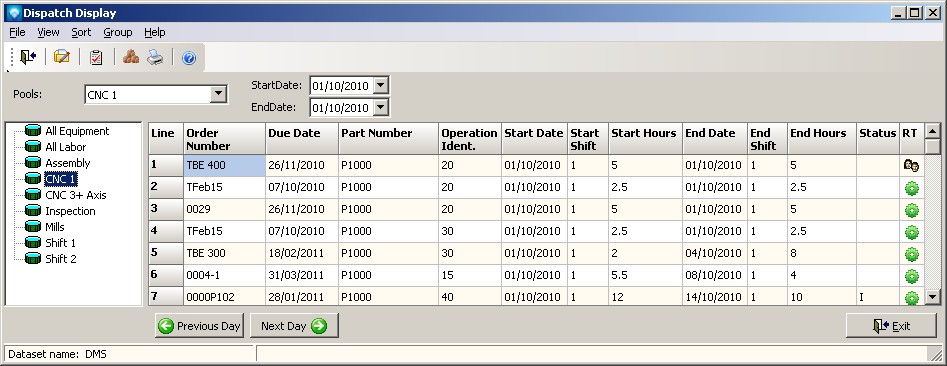
The example below shows a dispatch display grouping by pools where the pool CNC 1 has been selected:


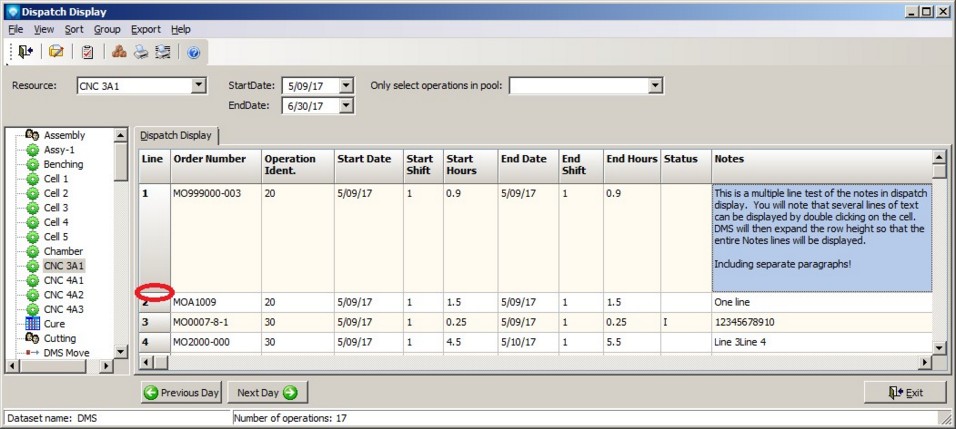
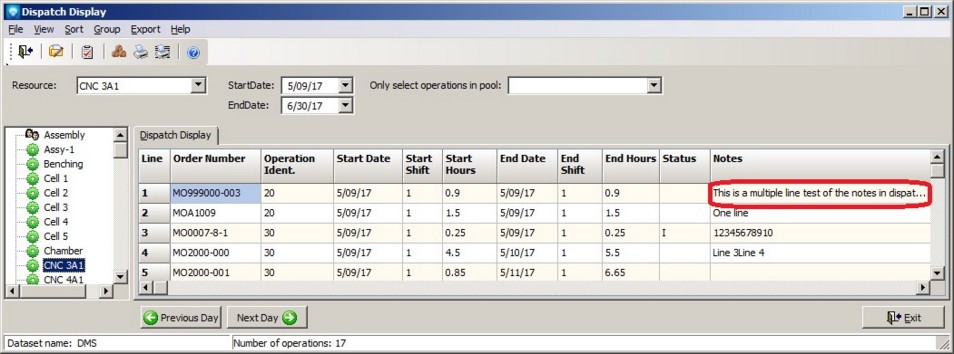
If you are displaying operations Notes in the Operation Grid, three ellipses (as in ...) will appear in the column if there are more lines of information to display.  If you double click on the Notes cell with the ... the row height will automatically expand to display the entire Notes.  If you double click on the cell again, the Notes will collapse to one line.  The example below shows a Notes column with additional lines to be displayed (circled in red):


Double clicking on the Notes cell with the ... will result in the Notes cell expanding as in the example below.  You can also manually adjust the row height by dragging the row height up and down in the Line column (circled in red in the first column in the example below):