Job States
Previous Topic  Next Topic 

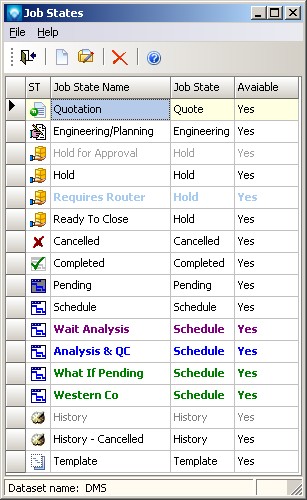
Job states are used to assign different attributes to a job. You can define your own job states or choose from the standard list.  Once a job state has been defined and is used by DMS, it cannot be deleted unless jobs using the job state are assigned to another job state.  Instead of deleting a job state you can make it unavailable for use by unselecting the Available check box.


The types of states and their associated icons are:


  1. Canceled: Will not be scheduled 
  2. Completed: Will not be scheduled
  3. Engineering/Planning: Will not be scheduled 
  4. History: Will not be scheduled
  5. Hold: Will not be scheduled 
  6. Pending: Will not be scheduled unless Pending jobs are released during a schedule run  
  7. Quote: Will not be scheduled 
  8. Schedule: Will be scheduled 
  9. Template:  will not be scheduled


Each job state you define can have its own name, color, and bold text for ease of identification in the Manufacturing Orders Job Grid.


To access Job States, select Tables | Job States.  The following example shows the Job States window where several job states have been defined using various colors and bold text:


Valid commands are:


  1. New To add a new job state, select File | New or click on the new icon .
  2. Edit To edit an existing job state, highlight the job state in the grid and select File | Edit or click on the edit icon .
  3. Delete  To delete an existing job state, highlight the job state in the grid and select File | Delete or click on the delete icon .  DMS will confirm the delete.  Click OK to delete the job state, or click Cancel to cancel the delete.


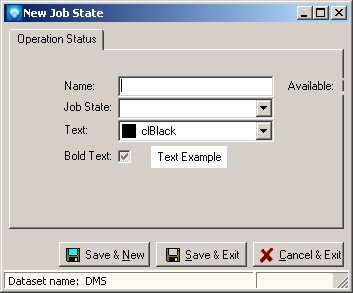
If New was selected, the following window appears. 


If Edit was selected, the following window appears:


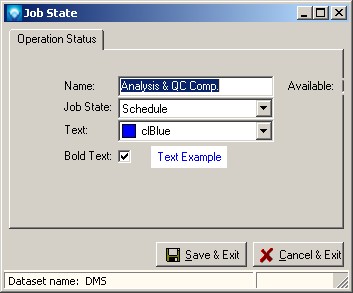
The following explains the prompts on the job state window:

  1. Name  A unique job state name must be entered.
  2. Job State  The job state is one of the following:
    1. Canceled
    2. Completed
    3. Engineering/Planning
    4. History
    5. Hold
    6. Pending
    7. Quote
    8. Schedule
    9. Template
  3. Text  Select the text color for the job state.  There are 20 valid colors to choose from.
  4. Bold Text  If you want the job state to use bold text, select the check box.  Otherwise do not select the check box.


If a new job state is being entered, you can click on the Save & New button to save the entry and keep this screen open to add another new job state.  Otherwise, click the Save & Exit button to save the entries or click Cancel & Exit to cancel the entries.