|
User Field Lookup Items
|   |
|
User Field Lookup Items
| |
User Field Lookup Items is where you define the items for each lookup name entered in User Field Lookup Names. For example, you may choose to define a lookup name called "Color". In User Field Lookup Items, you define all the color items you want to enable the user to select (i.e. Red, Black, Blue, Green, etc.).
Job User fields Lookup Items can have default colors. Lookup items can also be set up with conditions to be displayed or printed in color if the condition is met. For example, if a lookup item called “Material available” has a “No” setting for a job and the job is to start within 7 days, display the lookup value “No” in red. (See Defining Job User Field Conditions below.)
Once a User Field Lookup Item has been defined and is used by DMS, it cannot be deleted unless the job/operation user fields using the item are assigned to another item. Instead of deleting a User Field Lookup Item you can make it unavailable for use by unselecting the Available check box.
When you select Tables | User Fields | User Field Lookup Items, the following windows appears. Select the Lookup Name that you what to see the items for:
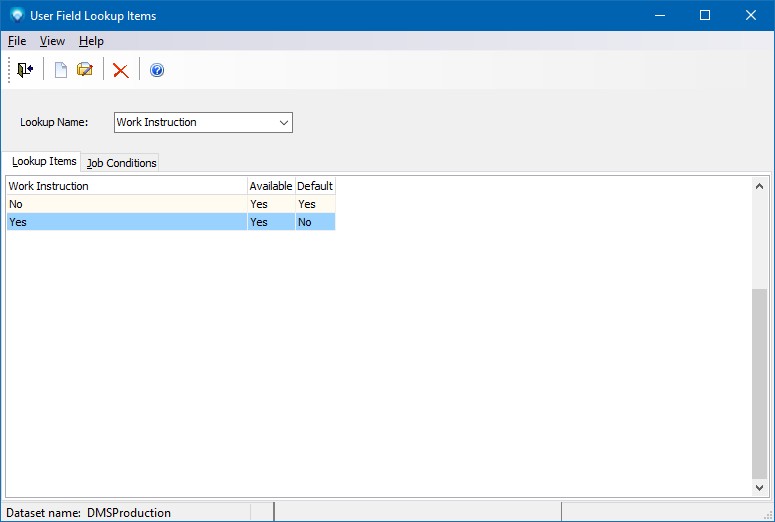
In the example below, the lookup name Work Instruction was selected. The corresponding items for Work Instruction are displayed:
Valid commands are:
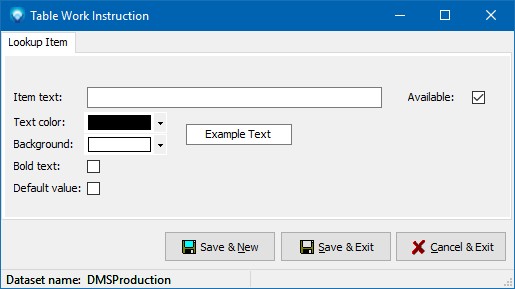
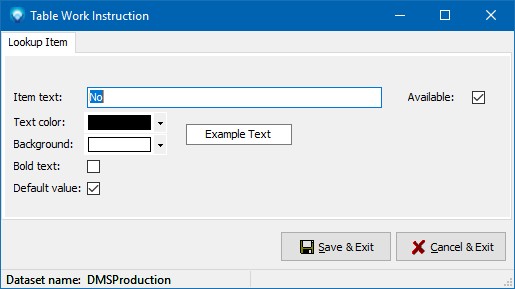
If New was selected, the following window appears. Enter the new lookup Item Text and optionally any notes if the prompt appears (User Field Lookup Names sets whether or not the notes prompt appears according to its Include Notes entry setting). Click the Save & New button to save the entry and keep this screen open to add another new lookup item, or click Save & Exit to save the lookup item and exit. Click Cancel & Exit to ignore the entry and exit the screen. When you are adding items to a lookup name, the lookup name appears in the caption of the windows. The example below is adding to the Work Instruction lookup name as the window caption is "Table Work Instruction":
If Edit was selected, the following window appears with the selected lookup item displayed. You can enter the new item text, notes if prompted for and desired, and/or change the Available setting. Click the Save & Exit to save the lookup item changes. Click Cancel & Exit to ignore the entry and exit the screen:
Defining Job User Field Conditions
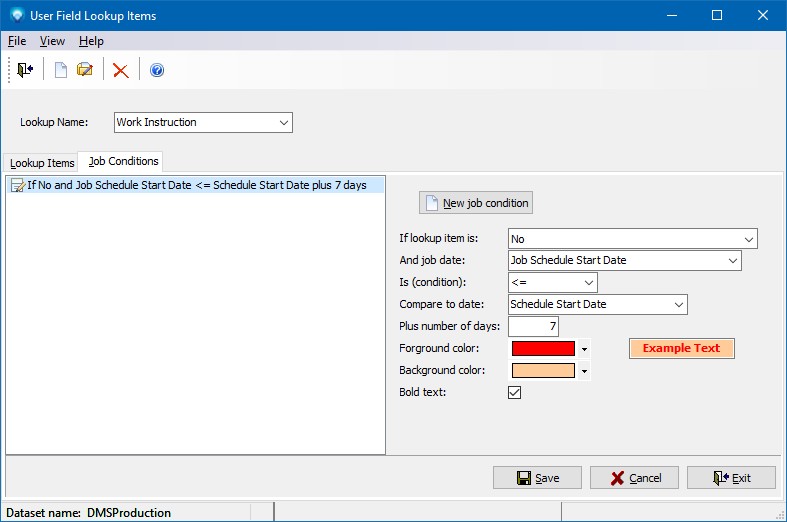
After a user fields lookup item has been added, conditions can be defined for the job user field. For example, if Work Instruction is No and the job is scheduled to start within 7 days, display the No user field in red.
To add a job user field condition, select the Job Conditions tab as in the example below:
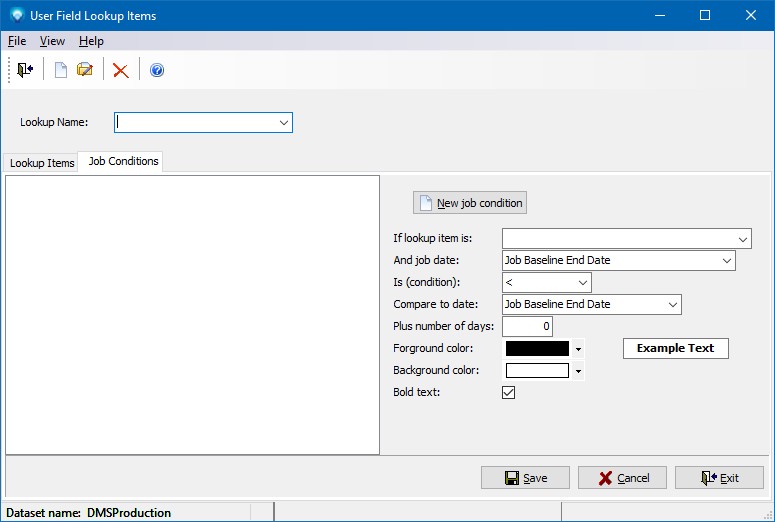
Enter the Lookup Name to display the current conditions (if there are any).
To add a new condition, click on the New job condition button. To edit a condition, click on the condition in the list box that you want to edit.
The example below shows one condition added to the Work Instruction lookup name. A summary of the condition is displayed in the listbox. In the example condition, the following has been defined:
If the lookup item for Work Instruction is No and the job date Job Schedule Start Date is less than or equal to (<=) the Schedule Start Date plus 7 days, display the user field item "No" in red with a pale orange background, as in:
![]()