|
Report on Jobs and Operations Tutorial
|   |
|
Report on Jobs and Operations Tutorial
| |
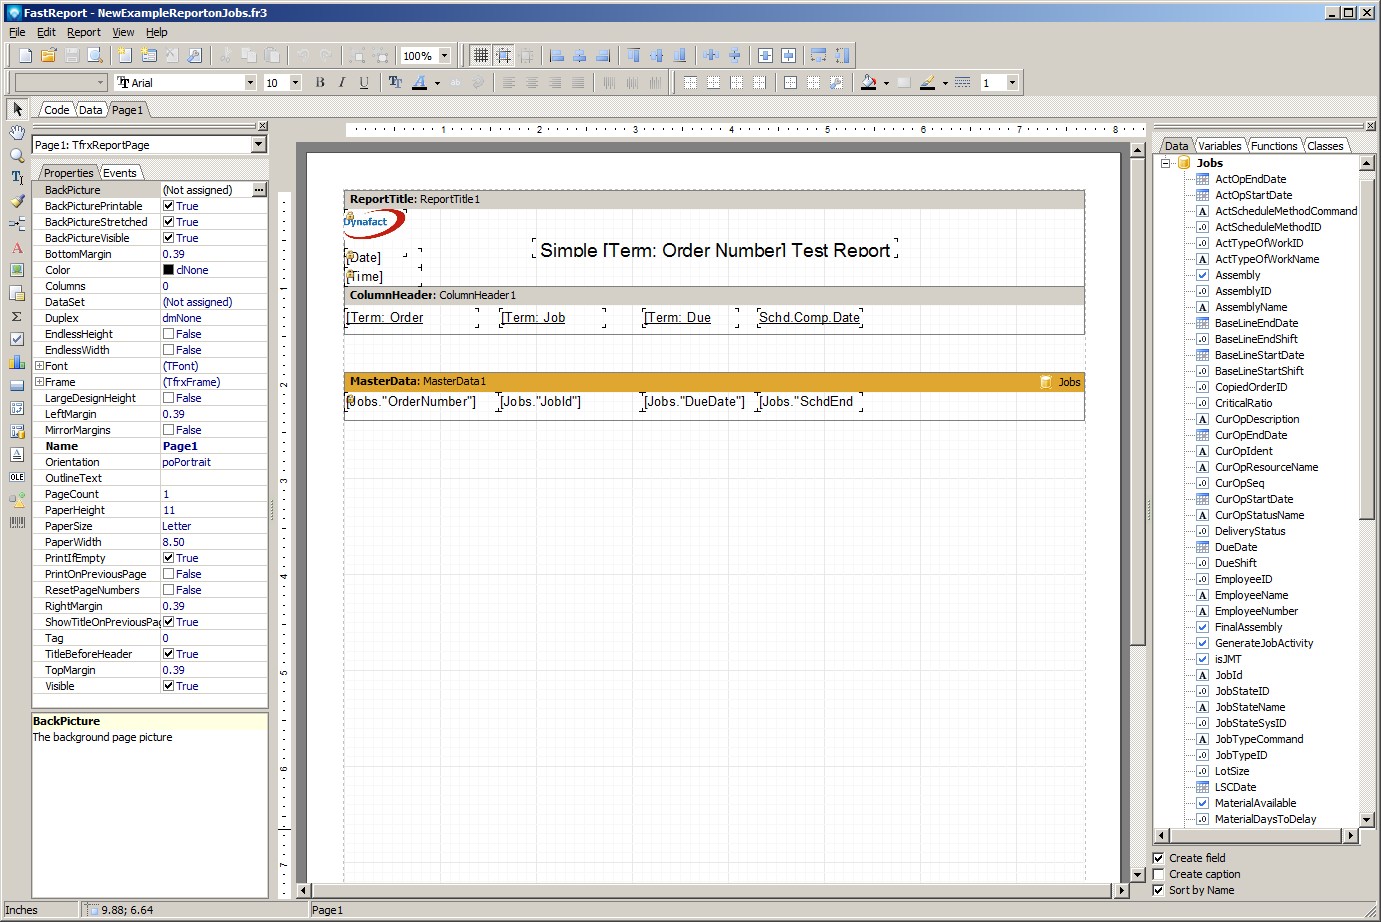
In this tutorial, we are going to edit the report created in the Report on Jobs Tutorial. From Mfg Orders Job grid, select the report and click on the Edit Report button. On the next window, select the Customize Report button and your report will appear in the DMS Report Designer similar to the example below:
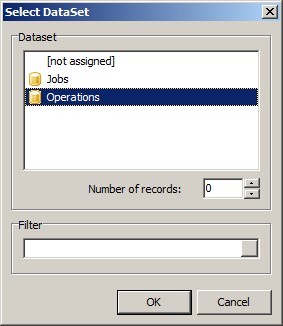
The first step is to add the dataset we want to use. From the menu, select Report | Data. A popup window will appear. Select the Operations dataset, as in the example below, and then press OK:
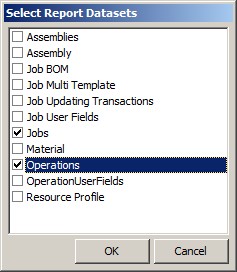
We now need to add a Detail Data Band so that we can place operations data on this data band. Click on the Data Band ![]() on the Designer Menu Bar and select the Detail Data Band. A popup window will appear showing the current selected datasets for this report. Highlight Operations, as in the example blow, and click OK:
on the Designer Menu Bar and select the Detail Data Band. A popup window will appear showing the current selected datasets for this report. Highlight Operations, as in the example blow, and click OK:
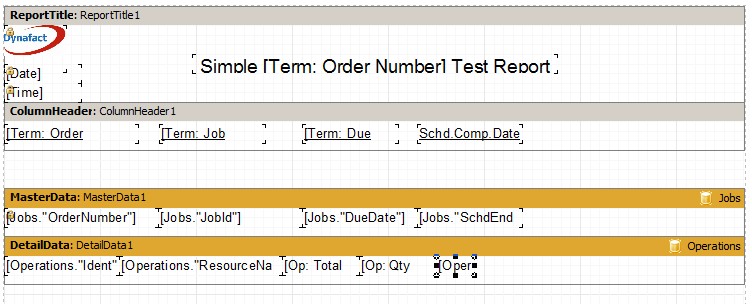
The report design area will appear similar to the example below:

On the Master Data Band, we can see that this band has been connected to the Jobs dataset as ![]() appears at the top the right side of band. Similarly, the Detailed Data Band is connected to Operations data set as
appears at the top the right side of band. Similarly, the Detailed Data Band is connected to Operations data set as ![]() appears at the top right side of the band.
appears at the top right side of the band.
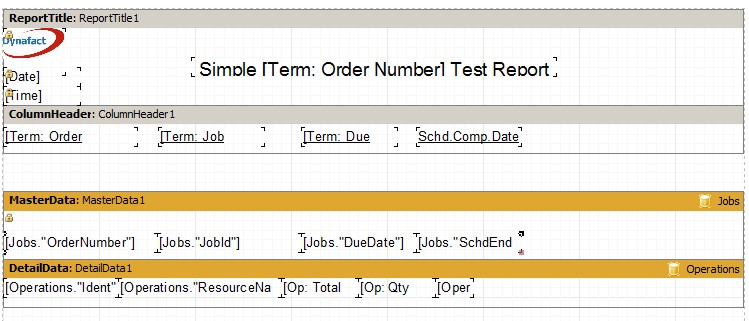
Add the following operation fields to the Detail Data Band:
Your design area will be similar to the example below:
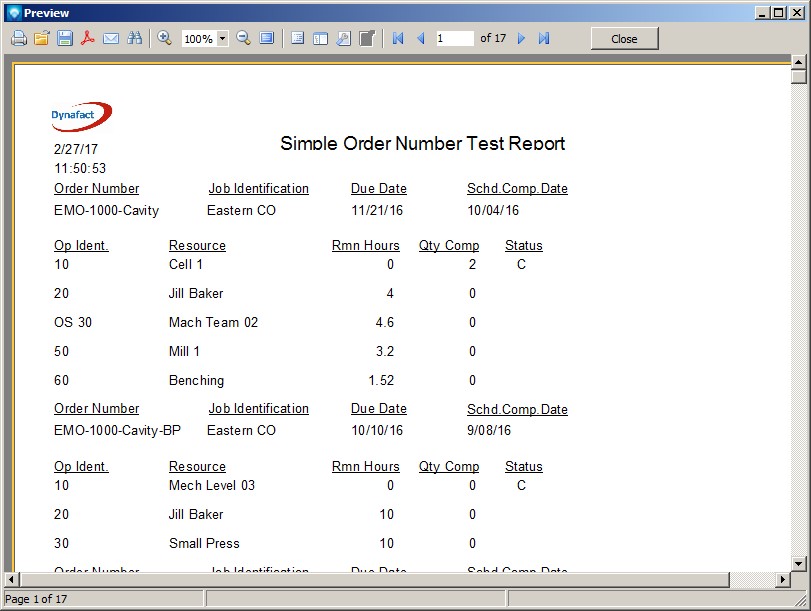
Save the report and exit. Exit from the Edit report window and try running this example report using View Report. Your report will be similar to:
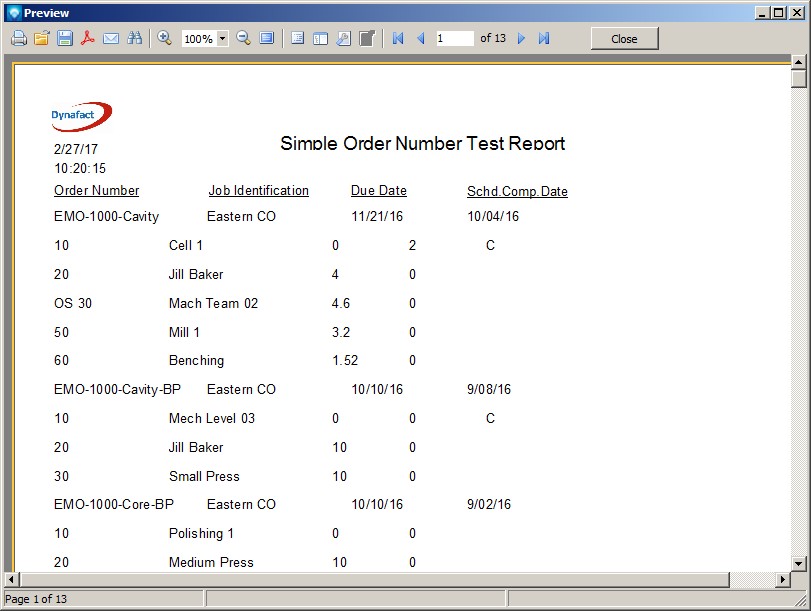
Exist from the Preview and exit from the View Report. From Mfg Orders Job grid, select the report and click on the Edit Report button.
We are now going to add formatting to this report so it is easier to read. You will note that from the original tutorial, we added a column header. The column header only appears once per page at the top of each column. Since we are reporting on a master - detail relationship, we want a heading to appear above every new job. To add this type of heading, we are going to add text to the Master Data Band.
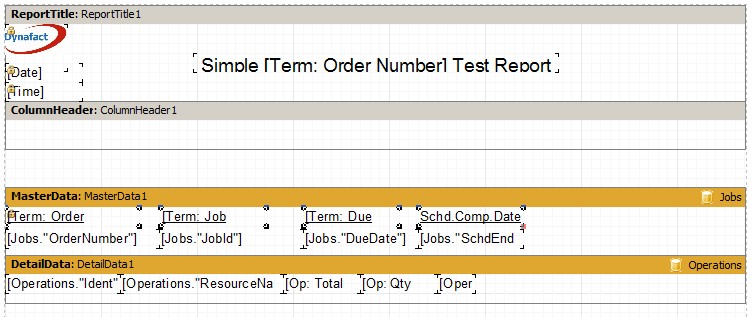
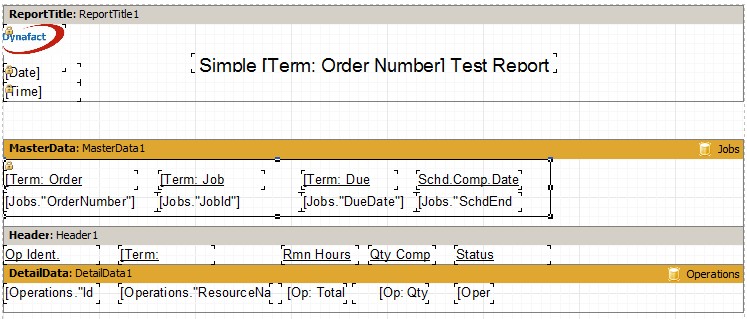
The first step is to make room on the Master Data Band for the new text headings. Click on the Master Data Band and resize the band height and make it larger. Then, click on the first data field, Jobs OrderNumber, and while holding down the Shift key, click on the other job fields DueDate, and SchdEndDate. Release the Shift key, and press and hold the Ctrl key. Using the cursor arrows, press the down arrow to move all the fields down in the Master Data Band. Your design area will be similar to:
We are now going to add column headings to the Master Data Band. We can either add one heading at a time by dragging and dropping Terms from the Variables tab and creating text boxes as required, or we can simply cut and paste the column headings already in the ColumnHeading band. To cut and paste the existing column headings, click on the first column heading and while holding down the Shift key, click on the other column headings so that all four headings are selected. Press and hold the Ctrl key and then press X to cut the headings from the report. Move your mouse key over the Master Data Band and press and hold the Ctrl key and then press V to paste the heading. You will note that the headings being pasted onto the report are controlled mouse. Using the mouse move the headings to the correct location and then press the left mouse key to drop the headings into place. Your design area will be similar to the example below:
Since we no longer need the ColumnHeader Band, click on this band and then press the right mouse key. A popup menu will appear. Select Delete to delete the ColumnHeader Band.
Save the report as we don't want to accidentally lose the work we have done. (If working on a large report and making many changes, it is a good idea to periodically save the report and view it to see what it looks like.)
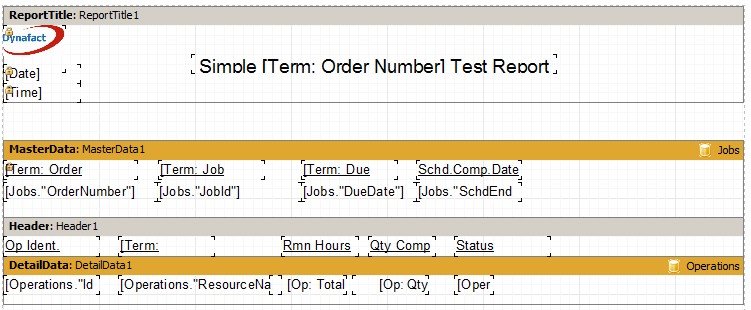
We are now going to add a header band for the operations. If we added a header fields to the Detail Data Band similar to what we did in the Master Data Band, the header will repeat for each operation printed. We want just one header for all the operations under each job. Therefore, we are going to add a Header Band. Click on the Data Band ![]() and select the Header Band. A Header Band will appear in the design area, but will most likely not be in the correct place which is above the Detail Data Band, but below the Master Data Band. Click on the Header Band to move it above the Detailed Data Band and below the Master Data Band. Your report will appear similar to:
and select the Header Band. A Header Band will appear in the design area, but will most likely not be in the correct place which is above the Detail Data Band, but below the Master Data Band. Click on the Header Band to move it above the Detailed Data Band and below the Master Data Band. Your report will appear similar to:
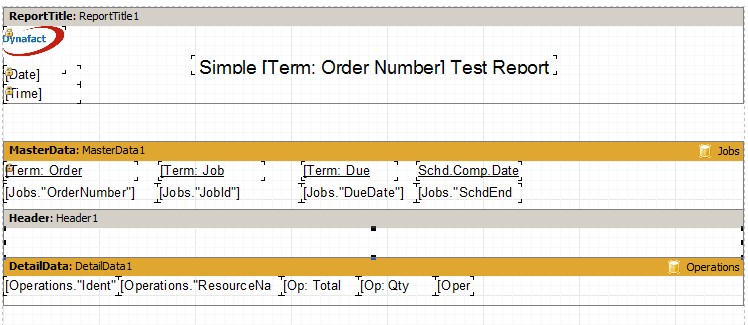
The next step is to add the headings for each operation column. Add the following:
As further enhancements, you can select all the columns in the Header using the Shift key and press the underline icon to underline the headings. You can also highlight the number columns on the operations Detail Data Band to right justify the columns using the toolbar icon ![]() or center the columns using the toolbar icon
or center the columns using the toolbar icon ![]() . You may want to adjust each bands hight to better format the report.
. You may want to adjust each bands hight to better format the report.
When you are finished, your report should appear similar to:
Save the report and try viewing it. Your report should look similar to th example below:
You may wish to try adding other formatting features to your report. For example, using the draw icon ![]() on the Designer Menu Bar, you can add lines and other shapes. In the example below, a rectangle was added to the Master Data Band around the columns:
on the Designer Menu Bar, you can add lines and other shapes. In the example below, a rectangle was added to the Master Data Band around the columns:
The report would then appear as:
