Security Certificates tab
Previous Topic  Next Topic 

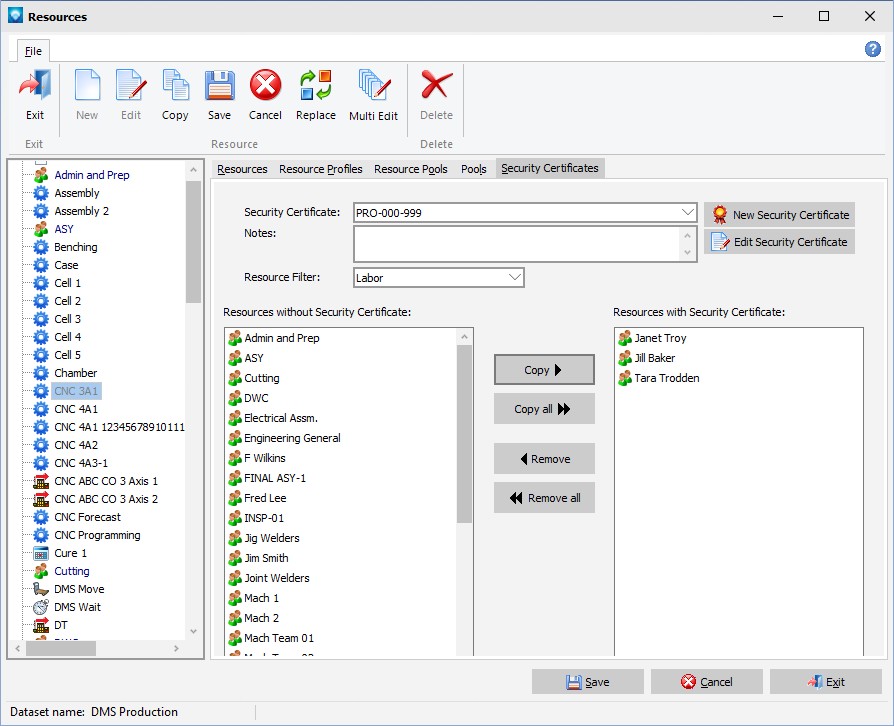
Security Certificates enables you to setup resources that are authorized to work on certain projects.  To identify the resources that can work on jobs, the Security Certificates tab in Resources is used.


Before you can add resources, you must first define a new security certificate using the Job Identification.  Once defined, you add the approved resources to the security certificate.


The window below shows an example of the Security Certificates tab in Resources:


The Security Certificates tab enables you to:


  1. Add a New Security Certificate
  2. Edit a Security Certificate
  3. Define Resources that can work on a Security Certificate


Add a New Security Certificate


To add a Security Certificate:


  1. Click on the New Security Certificates button.  The following popup window appears:


  1. New Security Certificate  Enter the job identification or use the drop down menu to select he job identification for the new security certificate.
  2. Notes  Enter an optional notes on the security certificate.
  3. Click the Save button to save the new security certificate or click the Cancel button to cancel the addition and close the popup window.


Edit a Security Certificate


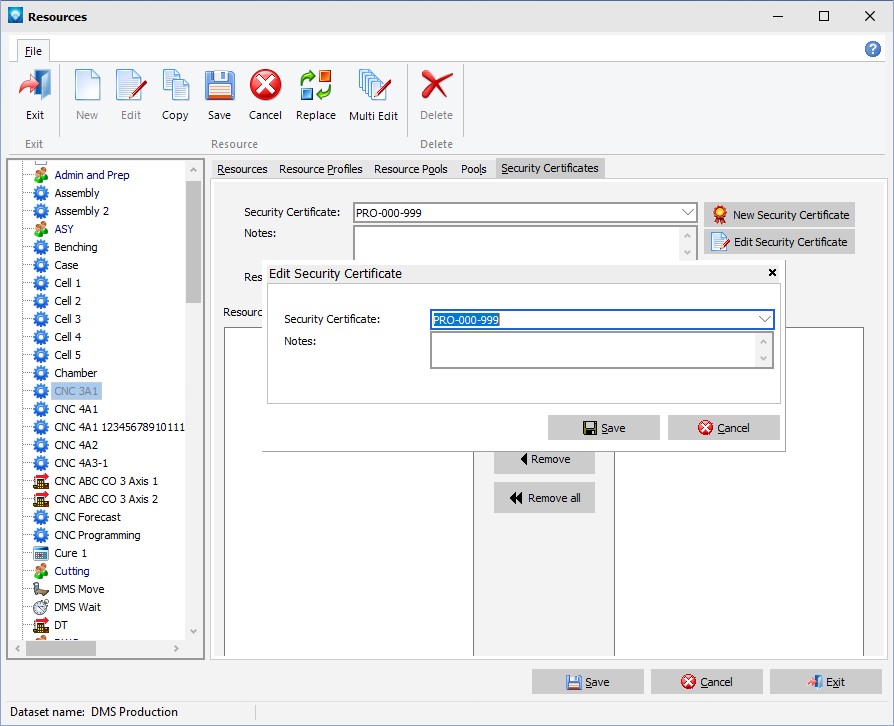
To edit a security certificate:


  1. Security Certificate  Select the security certificate to edit from the drop down menu.
  2. Click on the Edit Security Certificates button.  The following popup window appears with the selected security certificate displayed:


  1. Security Certificate  You can change the security certificate job identification or leave it as is.
  2. Notes  Add or edit the security certificate notes as required.
  3. Click on the Save button to save the changes.  Click on the Cancel button to ignore the changes.


Define Resources that can work on a Security Certificate


After you have added the security certificate(s) you can define the resources that are approved to work on the jobs.


To add resources to a security certificate perform the following steps:


  1. Security Certificate Select the security certificate to add or edit resources from the drop down menu.  If the security certificate has any notes, the notes will be displayed.
  2. Resource Filter  You can filter resources that are displayed in the Resources without Security Certificate selection box.  Valid filters are Resource, Labor, Outsource, Prepare, Break Tooling, Wait and Move.  If you leave the filter blank, all resources will be displayed in the selection box.
  3. Select the resources from Resources without Security Certificate and move them to Resources with Security Certificate to define the resources that can work on the jobs, or remove the resources Resources with Security Certificate to remove the approval for the resource to work on the jobs.
  4. Once you have defined all the resources for the security certificate, click the Save button to save the selections.  Click the Cancel button to ignore the changes.


The example below shows job identification PRO-000-999 has been defined as a security certificate.  A filter of Labor was used so that only labor resources are displayed in the Resources without Security Certificate.  There are three resources that have been approved to work on the jobs and they are listed in the selection box Resources with Security Certificate: