Edit Start/Stop Clock Job Updating |
|
The Edit Start/Stop Clock Job Updating enables an authorized user to edit existing start/stop clock entries. Edits made to the start/stop entries add a new job updating transaction adjustment for the corresponding job and operation and change the start/stop clock record.
The Edit Start/Stop Clock command is selected from Mfg Order Job Grid using File | Edit Start/Stop Clock Job Updating.
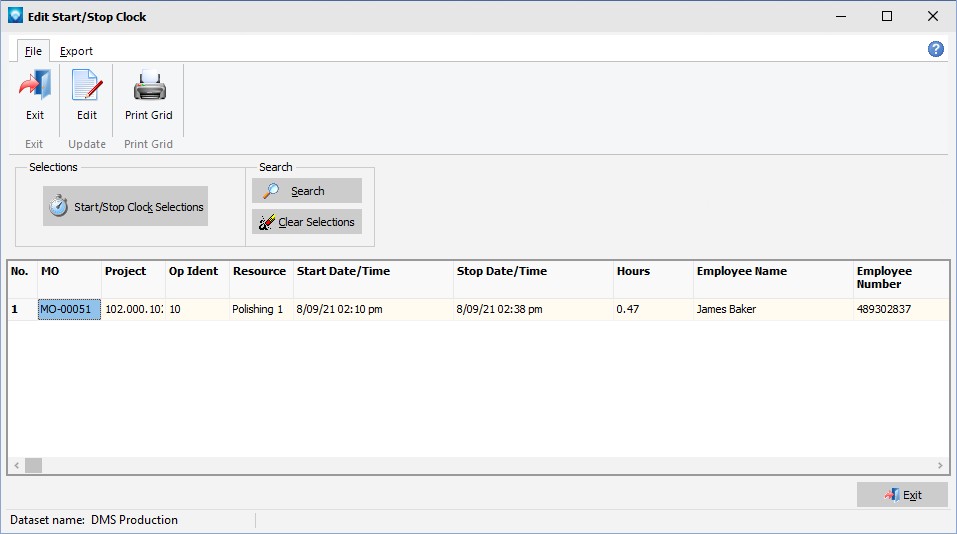
The example screen below shows the Edit Start/Stop Clock grid with "Order Number" renamed to "MO":
The following commands are available:
1.Start/Stop Clock Search Selections
2.Edit Start/Stop Clock Entries
4.Export Start/Stop Clock Grid
Start/Stop Clock Search Selections
The Edit Start/Stop Clock includes the following search options:
1.Select an order number or an order number range.
2.Select a start date as well as a conditional to search for. Conditionals are:
1.> for all entries greater than the start date
2.>= for all entries greater than or equal to the start date (the default)
3.= for all entries equal to the start date
4.<= for all entries less than or equal to the start date
5.< for all entries less than the start date
3.Select a stop date as well as a conditional to search for. Conditionals are:
1.> for all entries greater than the stop date
2.>= for all entries greater than or equal to the stop date
3.= for all entries equal to the stop date
4.<= for all entries less than or equal to the stop date (the default)
5.< for all entries less than the stop date
4.Select entries that do not have a stop time. This selection enables you to quickly locate entries that have not had a stop time entered by the user. If this search is selected, any Stop date search entry made is ignored for the search.
5.Select by employee number.
After the search selections have been entered, press the OK button to close the Start/Stop Clock Search. To perform the search after entries have been made, click the Search button on the Edit Start/Stop Clock window. Click the Cancel button to ignore the search selection entries.
Click the Clear Selections button to clear all existing entries from the Start/Stop Clock Search.
To edit a start/stop clock entry, double click on the entry in the grid, or click on the entry in the grid and then press the enter key, click on the edit button, or select File | Edit. The select clock entry appears in a new window enabling you to make changes as per the example below:
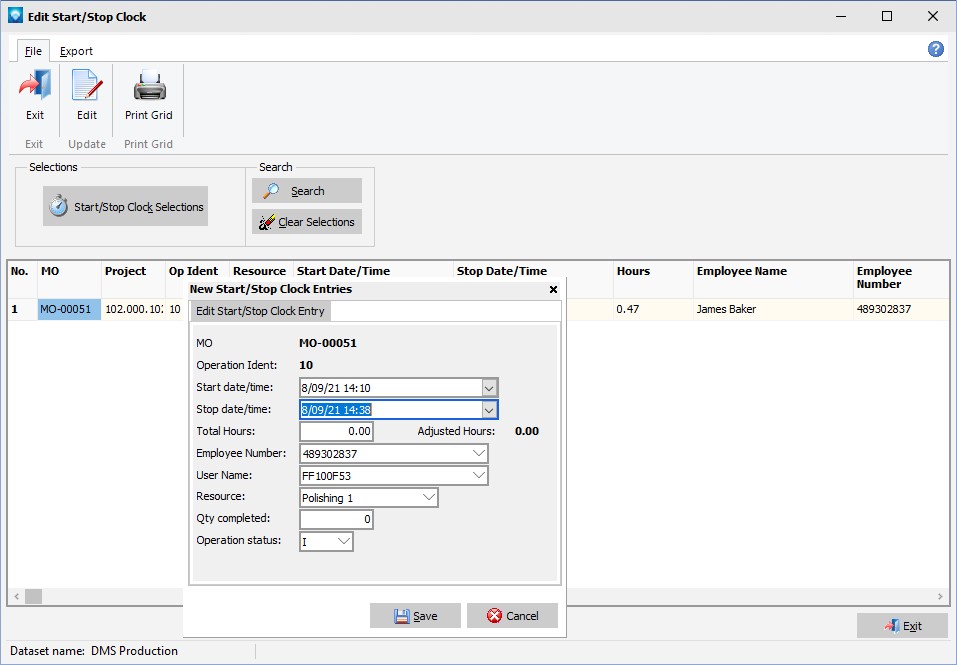
The following fields can be changed:
1.Enter a new start date and time. The date and time cannot be blank. The time is given in 24 hour clock format.
2.Enter a new stop date and time. The date and time cannot be blank. The time is given in 24 hour clock format.
3.The hours between the start and stop dates/times are calculated and displayed. You can change the stop date/time by entering new hours. If new hours are entered, the stop date/time is calculated by adding the hours entered to the start date/time. Once the hours have been entered, the Adjusted Hours are displayed. The Adjusted Hours are the number of hours that will be logged against the job and operation and is the adjusted amount of time calculated from the original entry made by the user.
4.A new user name can be entered.
5.A new resource can be entered.
6.If the Setup time is displayed, a new entry can be made. If the adjusted hours are to be applied to the actual runtime only, enter a setup time of 0. If a negative setup time is entered, the negative amount is subtracted from the current actual setup and added to the actual runtime. If a positive setup time is entered, the setup time is added to the current actual setup and the amount is subtracted from the adjusted hours applied to the actual runtime.
7.If the Type of Work is displayed, a new entry can be made.
8.If the Quantity Completed is displayed, a new entry can be made.
9.If Scrap is displayed, a new entry can be made.
10.A new Operation status can be entered.
11.If the Status Reason is displayed, a new entry can be made.
12.Note entries can be made for the edit.
Click on the Save button to update the new start/stop clock entry, apply the changes to the job and operation, log the entry in the job status transaction log, and close the New Start/Stop Clock Entries window. Click on the Cancel button to cancel the entry and close the New Start/Stop Clock Entries window.
Print Start/Stop Clock Grid
To print the currently displayed information in the grid, select File | Print. The following window appears:
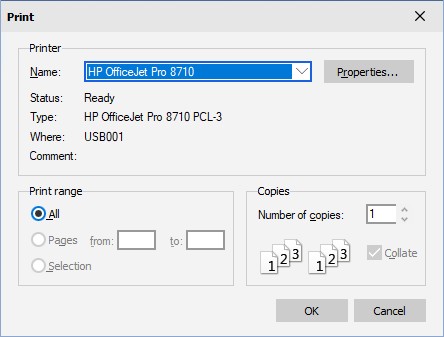
Select the printer name and click OK to print the grid, or press Cancel to cancel the print and exit the print window.
Export Start/Stop Clock Grid
You can export the Start/Stop Clock grid to a CSV, Word, or Excel file. See Export Grid Contents for information on exporting.