|
Report Scripts using Jobs Tutorial
|   |
In this tutorial, we are going to edit the report created in the Report on Jobs and Operations Tutorial and add a script to flag a job as On Time or LATE. (For overview information on scripts, please refer to Report Scripts.) This tutorial will be using the Pascal language for the script.
From Mfg Orders Job Grid, select the report you want to edit and click on the Edit Report button. Click on the Customize Report button and you will see the Report Designer display your selected report.
Click on the text icon ![]() on the designer menu bar to add a Text box to the report. Position the text box in the Master Data Band to the right side of the SchdEndDate job field. When the Memo popup for the text box appears, enter "Job Status" as in the example below and click the OK button. This text is not really required, but it does help when designing the report to name the text field on a report:
on the designer menu bar to add a Text box to the report. Position the text box in the Master Data Band to the right side of the SchdEndDate job field. When the Memo popup for the text box appears, enter "Job Status" as in the example below and click the OK button. This text is not really required, but it does help when designing the report to name the text field on a report:

Objects on a report (such as text) have Properties and Events. Properties are things such as the name of the object, hight and width of the object, the font color, etc. Events are actions that take place during the execution of a report. Events are actions such as On Before Print, On After Print, On Mouse Move, etc. For the text box, we are going to change a property and add an event.
With the new text field selected (highlighted), on the Object Properties list on the left side of the report designer find the Name property and to the right side of the Name enter "txtJobStatus". This type of naming convention tells us that it is a text box representing the job status. We will be using this name in the script we create. The example below shows the screen with the text box highlighted and the property Name entered (both areas circled in red):

With the text box named "Job Status" selected, at the top of the Object Properties list click on the Events tab to display the list of events. Find the "OnBeforePrint" event and on the right side of the event double click the blank space. The example below shows that the Job Status text box is highlighted, the OnBeforePrint event is displayed and the blank space next to the event circled in red is where you double click:

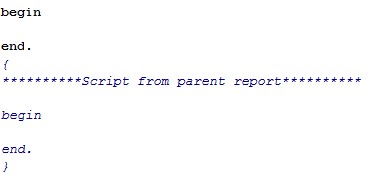
After the double click on the event name, the Report design will display the Code tab enabling you to enter a script as in the example below:

A few things to note about the Code tab:

The Pascal script below compares the job's schedule end date with the job's due date, and if the schedule ends date is greater than the due date, the job is late. If the job is late, the script sets the text box txtJobStatus text to be "LATE" and then sets the text box font color to be red. If the job is not late, the script sets the text box txtJobStatus text to be "On Time" and then sets the text box font color to be green. Enter the following Pascal script exactly as it appears below. Note that certain lines end with a ; while others do not. For the job fields SchdEndDate and DueDate, you can use the Data tab on the right side of the window to select these fields. Position the cursor where you want the job field to be and double click on the Data tree job field you want to add. The example below has the job fields in bold text. Make sure you do not confuse the < and > surrounding the job fields with the greater than size > between the two fields:
if <Jobs."SchdEndDate"> > <Jobs."DueDate"> then
begin
txtJobStatus.Text:='LATE';
txtJobStatus.Font.Color:=clRed;
end
else
begin
txtJobStatus.Text:='On Time';
txtJobStatus.Font.Color:=clGreen;
end;
After entering your script, your window will appear similar to the example below:

Save the report, exit the Report Designer, and then exit the Edit Report screen to return to Mfg Orders Job Grid. Trying running the report using View Report. Your report should be similar to the example below:
