Email Contacts
Previous Topic  Next Topic 

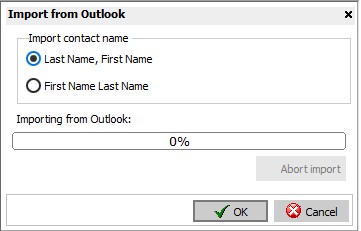
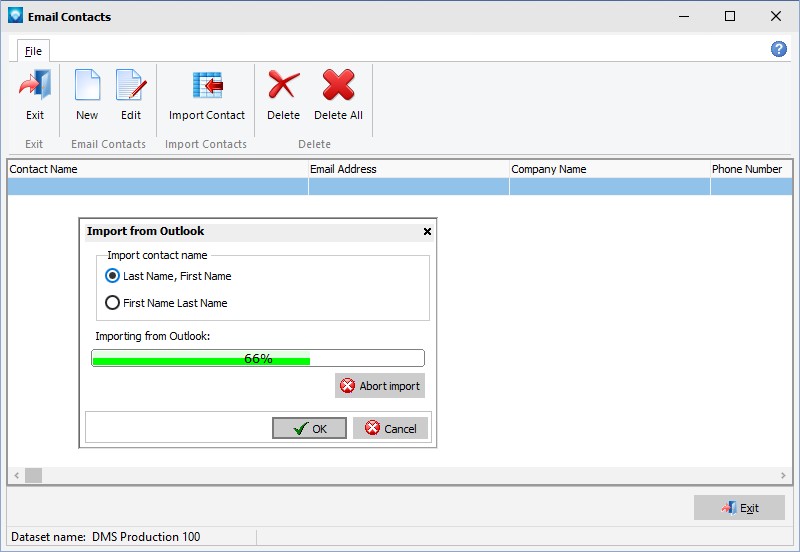
Email Contacts enables you to import emails from Microsoft Outlook and to enter one or more emails manually.  To select Email Contacts use Tables | Email Contacts.  The following window appears:


The user can add a new email, edit existing emails, delete an email, delete all emails, and import emails from Microsoft Outlook.


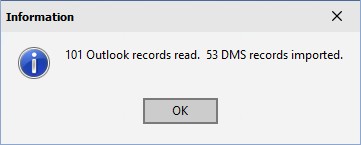
To import all emails:


  1. Select the command File | Import Emails.
  2. The following window appears:


  3. Select how you want the import name to be saved.  You can either save the imported names by Last name, First name (the default) or by First Name, Last name.
  4. Click the OK button to start the import, or click the Cancel button.  If OK is selected, the import begins as per the screen below:


  5. During the import, you can click the Abort Import button to abort the import.
  6. When the import has completed, a window similar to the one below appears:


  7. Click OK to close the window.  The Email Contacts grid will now be populated with the imported emails.


To create a new email or edit an existing email:


  1. From the Email Contacts window, select either New to add a new email or Edit to edit an existing email.  The following window will appear (if edit was selected, the window will appear with the selected contact email information):


  2. Contact name Enter or edit the contact name. 
  3. Company name Enter the company name.
  4. Contact email Enter the contacts email.  Note that the contact email must be in a valid email format (i.e. pete.cox@dynafact.com).
  5. Phone number Enter the contact phone number.
  6. Contact Notes Enter any notes about this contact.
  7. If editing an email, you can either click Save & Exit to save the changes and exit or click Cancel & Exit to ignore the email change and exit.  If adding a new email you have the option to click Save & New to save the current contact and add a new contact.


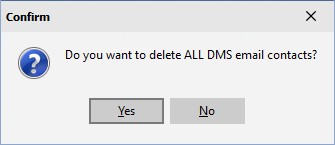
To delete all email contacts:


  1. From the Email Contacts window select the command File | Delete All.
  2. The following window will appear:

  3. Click Yes to delete all existing emails or select No to ignore this command.