User Field Lookup Items |
|
User Field Lookup Items is where you define the items for each lookup name entered in User Field Lookup Names. For example, you may choose to define a lookup name called "Color". In User Field Lookup Items, you define all the color items you want to enable the user to select (i.e. Red, Black, Blue, Green, etc.).
Job User fields Lookup Items can have default colors. Lookup items can also be set up with conditions to be displayed or printed in color if the condition is met. For example, if a lookup item called “Material available”, has a “No” setting for a job, and the job is to start within 7 days, display the lookup value “No” in red. (See Defining Job User Field Conditions below).
Once a User Field Lookup Item has been defined and is used by DMS, it cannot be deleted unless the job/operation user fields using the item are assigned to another item. Instead of deleting a User Field Lookup Item you can make it unavailable for use by unselecting the Available checkbox.
When you select Tables | User Fields Setup | User Field Lookup Items, the following window appears. Select the Lookup Name that you want to see the items for:
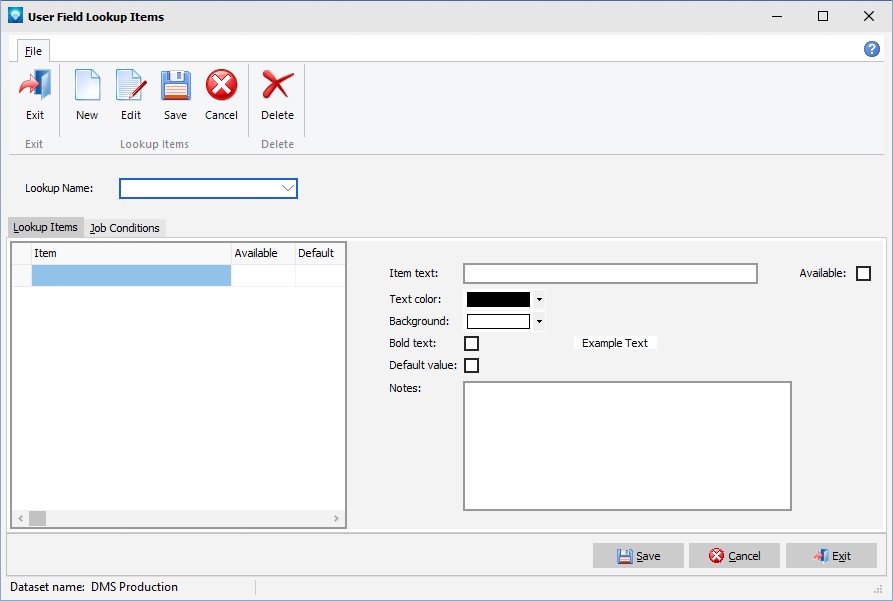
In the example below, the lookup name Work Instruction was selected. The corresponding items for Work Instruction are displayed:

The following tabs and commands are available:
File
1.New To add a new User Field Lookup Item, select File | New.
2.Edit To edit an existing User Field Lookup Item, highlight the User Field Lookup Item in the grid and select File | Edit or double click on the item in the grid to edit.
3.Delete To delete an existing User Field Lookup Item, highlight the User Field Lookup Item in the grid and select File | Delete or click on the delete icon ![]() . DMS will confirm the delete. Click OK to delete the User Field Lookup Item, or click Cancel to cancel the delete.
. DMS will confirm the delete. Click OK to delete the User Field Lookup Item, or click Cancel to cancel the delete.
Defining Job User Field Conditions
After a user field lookup item has been added, conditions can be defined for the job user field. For example, if Work Instruction is No and the job is scheduled to start within 7 days, display the No user field in red.
To add a job user field condition, select the Job Conditions tab as in the example below:

Enter the Lookup Name to display the current conditions.
To add a new condition, click on the New job condition button. To edit a condition, click on the condition in the list box that you want to edit.
1.If lookup item is Select the lookup item you want to add the condition to.
2.And job date Select the job date you want to use as a comparison for the lookup item. Valid job dates are:
1.Job Baseline End Date
2.Job Baseline Start Date
3.Job Due Date
4.Job Last Schedule Completion Date
5.Job Material Expected Date
6.Job Material Received Date
7.Job Order Date
8.Job Promise Date
9.Job Release Date
10.Job Schedule Completion Date
11.Job Schedule Start Date
12.Schedule Start Date
3.Is (condition) Select the comparison condition for the dates. Valid conditions are:
1.< if the first date selected is less than the second date selected
2.<= if the first date selected is less than or equal to the second date selected
3.= if the first date selected is equal to the second date selected
4.>= if the first date selected is greater than or equal to the second date selected
5.> if the first date selected is greater than the second date selected
4.Compare to date Select the second date that you want to compare to the first date. Valid job dates are:
1.Job Baseline End Date
2.Job Baseline Start Date
3.Job Due Date
4.Job Last Schedule Completion Date
5.Job Material Expected Date
6.Job Material Received Date
7.Job Order Date
8.Job Promise Date
9.Job Release Date
10.Job Schedule Completion Date
11.Job Schedule Start Date
12.Schedule Start Date
5.Plus number of days Enter how many days you want to add to the second compare to date. For example, if you select the Schedule Start Date as the Compare to date, the plus number of days is added to the Schedule Start Date for comparison purposes.
6.Foreground color Select the foreground color you want to display if the condition is true.
7.Background color Select the background color you want to display if the condition is true.
8.Bold text Select the checkbox if you want the display to be bold text if the condition is true.
9.Click the Save button to save the condition. Click the Cancel button to abort the changes.
The example below shows one condition added to the Work Instruction lookup name. A summary of the condition is displayed in the listbox. In the example condition, the following has been defined:
If the lookup item for Work Instruction is No and the job date Job Schedule Start Date is less than or equal to (<=) the Schedule Start Date plus 7 days, display the user field item "No" in red with a yellow background.

Using the above example, if a job matches the above condition where the Work Instruction is No, the user field would appear with red text on a yellow background, as in the example Dispatch Display below:
