LOB Chart |
|
The LOB (Line of Balance) Chart is used to view the product process timeline. The same parts or jobs with the same routings should be selected for the display, and these selected parts/jobs can have a date range selection. Prime operations are displayed for each job and show the operation schedule end date, the operation baseline date, and the percent completed for the operation. The chart not only displays whether or not the job is late, it also does a comparison between the operation schedule end date and the operation baseline date. If the operation schedule end date is later than the operation baseline date, the operation dates and percent completed are displayed in red.
An optional red line can be drawn on the chart that represents today's date or the first day of the schedule (schedule start date). Jobs above the red line are ahead of schedule. If dissimilar jobs are selected, the chart's red line will not be as easy to read and the comparisons of parts or projects may not make as much sense.
The chart is limited to displaying up to 1,000 jobs at a time for up to 1,000 unique operations. If these numbers are exceeded, DMS lets you know that you should select a smaller selection of jobs to display.
The chart options are set using the LOB Chart Options. The options include what job user fields you want to display, what operation information to display and use to gather like operations together, color selections, and options for the red line.
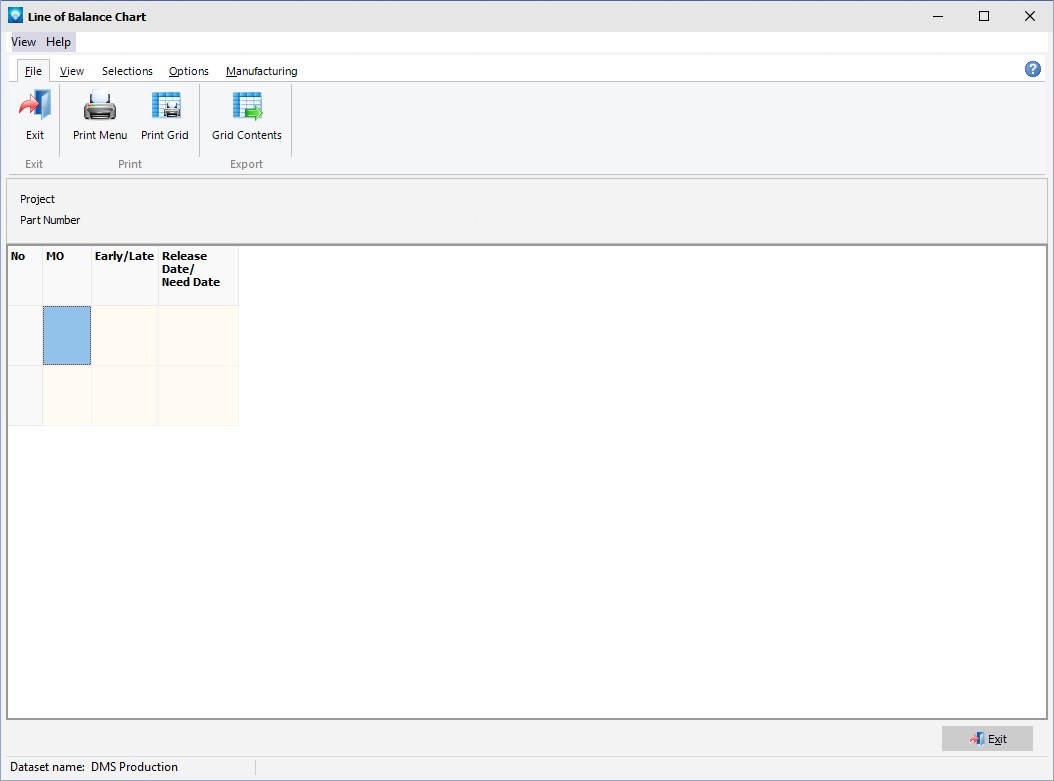
The LOB Chart is selected from the Manufacturing Orders Job Grid using Display | Lob Chart. The example screen below shows what the LOB Chart may look like when you first enter the display. The Order Number is displayed followed by any user fields that have been selected to be displayed, an Early/Late count for the jobs, and the Release Date/Due Date column. From this screen you select what jobs you want to display plus an optional date range:
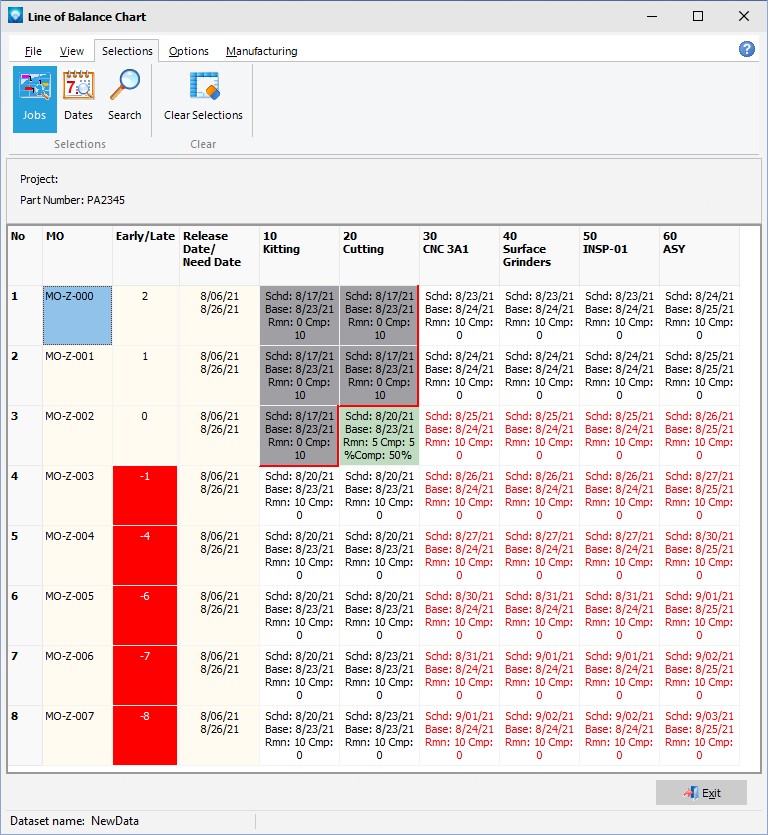
After job selections and date selection have been made on the Selections tab, press the Search button. The selected jobs will be displayed in the chart. In the example below, part number PA2345 was selected and the following jobs with that part number were displayed:
The following tabs and commands are available:
File
1.Print Menu Select File | Print Menu to print a DMS Report as setup by Module Report Settings.
2.Print Grid Select File | Print Grid to print the current LOB grid.
3.Export Grid Contents
View
1.Operation Columns Width Selecting this command enables you to set the column widths of the cells with the job information. A popup window appears where you can enter the column width as in:.png)
Enter a new column width and press OK to reset all the job cells to the new column width. Press Cancel to ignore the change.
Selections
1.Jobs Select Selections | Jobs to select jobs based on the job header information. If selected, the Mfg Orders Job Grid automatically toggles off.
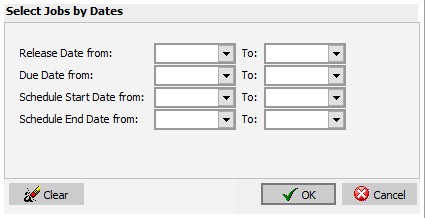
2.Dates Select Selections | to select jobs by job dates using the window below:
3.Search Click on Search to perform the job search.
4.Clear Selections To clear your current search criteria, click on the Clear Selections button. DMS will confirm the clearing of selections.
Manufacturing
1.New Job To add a new job.
2.Edit Job To edit the first job in the Manufacturing Order job tree.
3.Calendar/Capacity Changes are changes you want to make to the manufacturing calendar such as holidays, planned overtime, planned shut downs, etc.
4.Resources is used to add, edit, delete resource settings.
5.Schedule Run Run a global schedule.
6.Job Updating is used to manually enter detailed time updates to a job.
The example below shows the LOB Chart after jobs were selected for a part called "P1000-Test". The order number is displayed along with:
1.Each of the selected job user fields as defined in the LOB Chart Options.
2.The Early/Late count for the job. If the job is early or on time (zero or positive number), the early/late count is displayed in black. If the job is late (negative number), the early/late count is displayed with a red background.
3.The job's release date and due date are displayed.
4.Each operation is displayed across the top of the chart. In each operation cell the operation scheduled end date, the operation baseline end date, and the percent complete for the operation are displayed. If the operation scheduled end date is later than the operation baseline end date, the dates in the cell appear in red.
5.A red line is drawn showing either the first day of the schedule or today's date, depending on the options selected.
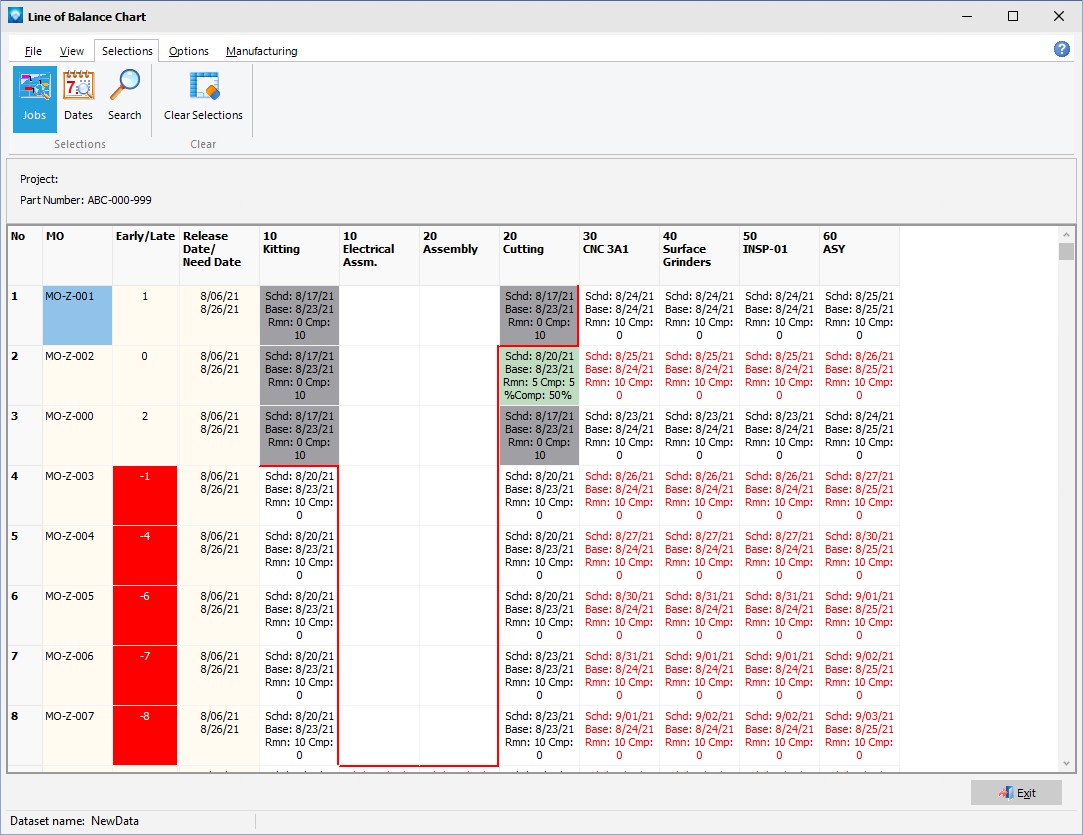
If dissimilar parts/jobs are selected, not all jobs may have the same operations. Operations not used by a job are left blank as in the example below:
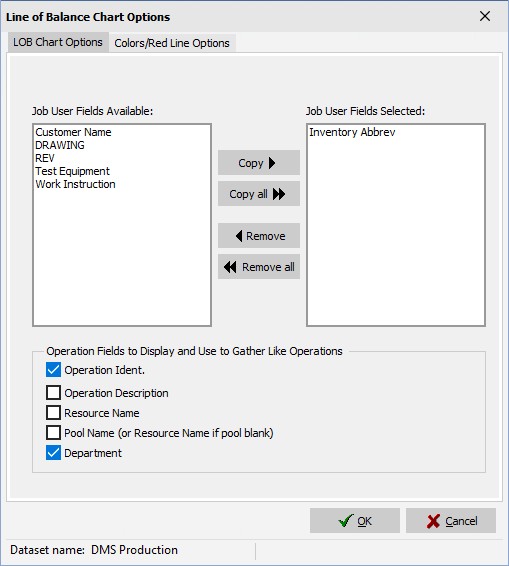
The LOB Chart Options has two tabs; one to select the job user fields and operation information to display, and a second tab to select colors and the red line options.
On this first tab (example below), the job user fields to display are selected in the list box. The order of the job user fields in the "Job User Fields Selected" list box is the order of how the user fields will be displayed on the LOB Chart. You can drag and drop job user fields in the "Job User Fields Selected" list box to change the display order.
The Operation Fields to Display and Use to Gather Like Operations is used to select what operation fields you want to display at the top of the chart in the operations section and it also defines how the LOB Chart will gather like operations together for the display. For the gathering of like operations, all the selected fields must match in order for the display to position the operations in the column. That is, if you select Operation Ident. and Resource Name, both these fields must match between jobs in order for the operations to be displayed under the same operation column.
You can display and gather on the following fields:
1.Operation Ident. It is recommended that if you plan on displaying like parts and jobs, this field be selected for gathering purposes.
2.Operation Description
3.Resource name
4.Pool name If the pool name is blank, the chart will display the resource name. If you are using Pools and want to display Pools and/or resource names, this option is recommended over selecting just the resource name.
5.Department name
In the example below, the job user field "Inventory Abbrev" will be displayed in the LOB Chart. The operation column titles will be made up of the Operation Ident. and the Department. Also, Operation Ident. and the Department will be used to gather jobs operations into the same column:
The second tab on the LOB Operations options is used to define colors and red line options. For colors you can select:
1.The job background color
2.The completed operation color
3.The in-process operation color
4.The scheduled operation color
The red line options enable you to:
1.Draw the red line. If checked, the red line will be drawn.
2.Compare dates to either the first day of the schedule or today's date.
3.Compare the date in item 2 selected above to either the operation schedule end date or to the operation baseline end date.
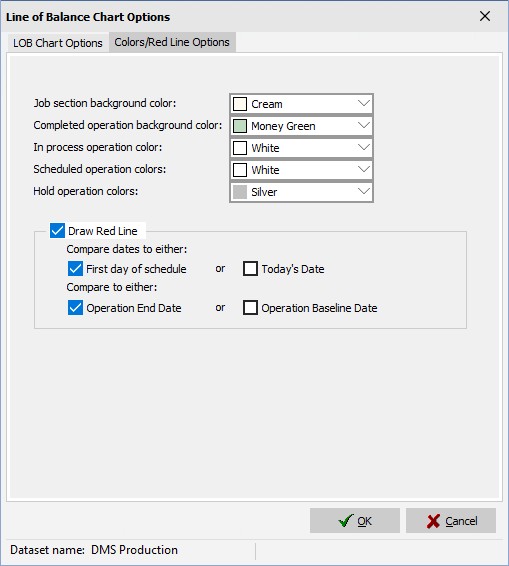
After the options have been selected, click OK to save the options. Click Cancel to ignore the changes. If OK is selected, any current information displayed in the LOB Chart disappears. You can refresh the displayed jobs by clicking on the Search button.