Resources tab contains the header information for a resource. If you selected a New resource to add, the following screen appears:

Valid commands are:
- Add or Edit a new resource.
- Copy an existing resource to a new resource.
- Replace a resource in all operations with another resource.
- Multi Resource Editor to edit selected fields of all the resources list in the Resource tree to new values.
- Delete a resource.
Add or Edit a Resource
Before you can gain access to the Resource Profiles tab or the Resources Pools tab the resource's header information must be entered and saved. The resource header information is as follows:
- Resource Name Each resource must have a unique name that is used to identify the resource to an operation. The name can be up to 20 alphanumeric characters long.
- Department Enter the department that the resource belongs to. You can enter a blank department by entering a space.
- Type of Resource Enter the type of resource. Resource types are either Break, Labor, Outsource, Inventory, Prepare, Resource, Move or Wait. The resource tree will display the corresponding resource icon depending on the type of resource selected. Note you can only have one resource that is Move and one resource that is Wait. DMS creates a default Move and Wait resource called "DMS Move" and "DMS Wait".
- Hours/Shift Enter the standard Hours per Shift for this resource. The hours per shift are used as the standard to populate the resource profile's hours per shift.
- Hours/Operation Enter the standard Hours per Operation for this resource. The hours per operation are used as he standard to populate the resource profile's hours per operation.
- Efficiency Factor Enter the Efficiency Factor for the resource. The efficiency factor is applied to both the hours per shift and the hours per operation to calculate the amount of scheduled capacity available.
- Standard Cost/Hr Enter the standard cost per hour for the resource. The standard cost/hr is used by the Overtime Analysis to calculate standard costs versus overtime costs for a resource.
- Overtime Cost/Hr Enter the overtime cost per hour for the resource. The overtime cost/hr is used by the Overtime Analysis to calculate standard costs versus overtime costs for a resource.
- Resource user fields If resource user fields have been setup, they appear before the Notes prompt. Each user field entry can be up to 45 characters long and is a free format entry. Note that once an entry is made to a resource user field DMS saves that entry with the resource. If you change an existing resource user field prompt, the old entry will remain with resource; only the prompt has been changed.
- Notes Enter any notes or comments you would like to make about this resource.
- Available You cannot tab to this field; you must use the mouse. The Available check box defaults to yes (checked) for new resources. It is used to identify if the resource is available for you to use during the planning of operations. If Available is not checked, then the resource cannot be used for planning or scheduling. Note that once a resource has been used by an operation, even if the operation is in history (i.e. the job state is history), the resource cannot be deleted. If you would like to remove a resource so that it can no longer be used for planning and in the schedule, remove the check mark from the Available prompt. (During scheduling if an unavailable resource is specified, the scheduler will write an error to the schedule run report unless the operation has a pool enabling the scheduler to select a new available resource. In this case, the scheduler will select a new resource from the pool for the operation.)
- Click Save to save the new resource and continue with entering other information, or click Save & New to save the resource and then start to enter another new resource. Click Cancel to cancel the addition of the new resource.
The edit screen is identical to the new screen except all the resource tabs are available for editing and the Save & New button is not displayed. You can change an existing resource's name which takes place immediately and affects all operations in DMS that use that resource.
Copy Resource
You can copy an existing resource and all it profiles to a new resource. The main resource information (on the Resources tab) and all its profiles are copied. The resource pools of the resource to copy are not copied to the new resource. To copy a resource and all its profiles, highlight the resource you want to copy in the Resource tree and select File | Copy. A pop up window will appear asking you to enter the name of the new resource. Enter the new resource name and click OK to save the new resources and its new profiles. Click Cancel to cancel he copy. The following example shows the pop up window after the copy command has been selected. The resource to copy is Assembly (highlighted in the tree in the example below):

Note that you cannot copy a Move or Wait resource type as only one of each of these types of resources is allowed at a time.
Replace Resource
You can replace one resource with another resource for all operations that are not in history and are not completed. The Replace command is very powerful and fast, and once executed it cannot be undone. Caution should be exercised when using the Replace command. To replace a resource with another resource, select File | Replace. The following window appears:

To a replace one resource with another resource, perform the following steps:
- Resource to replace Enter the name of the resource you want to replace.
- Replace with resource Enter the name of the resource that will used as the replacement.
- Click the OK button to replace the resource or click the Cancel button to cancel the replace and clear the entered information.
- If OK was selected, DMS verifies the replace with the following window displaying the resource to be replaced and the resource to replace it:

- Click OK to perform the replace or click Cancel to cancel the replace.
- DMS will replace all occurrences of the resource with the new resource for all operations not in history and not completed.
Multi Resource Editor
The Multi Resource Editor enables you to edit several resources at one time. All the resources listed in the Resource tree will be changed to the new settings given in the Multi Resource Editor window. The Resource Selections in Resources is used to filter out what resources you want to change. Once you have used Resource Selections and chosen the resources to edit, on the Resources tab select | Multi Resource Editor from the menu. The following window appears. In this example, five resources have been selected to edit:

Select the check box of the field you want to change and then enter a new value for the field. Once you have made all the entries for the change, select the OK button. DMS verifies the changes as in the example below:

Select Yes to apply all the changes to the resources. Select No to ignore the changes. If Yes is selected, DMS changes all the resources in the Resource tree to the entered values. Note that you cannot reverse a multi resource edit; once the changes have been applied you cannot undo the changes.
Delete Resource
Select File | Delete to delete an existing resource. For example, to delete the resource "Benching" you would select the resource in the Resource tree by clicking on the resource and then select delete. DMS will confirm the delete with a window as follows:
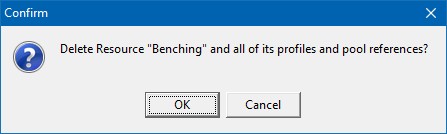
If you click OK, the resource and all its profiles and pool references will be deleted. Click Cancel to cancel the delete.
Note that you cannot delete a resource that is used by an operation even if that operation is in history. However, you can make a resource unavailable for future use by removing the check from the Available prompt on the Resources tab. Also, you cannot delete a Move or Wait resource type, but you can mark them unavailable for future use by removing the check from the Available prompt on the Resources tab.

