|
Job tab
|   |
|
Job tab
| |
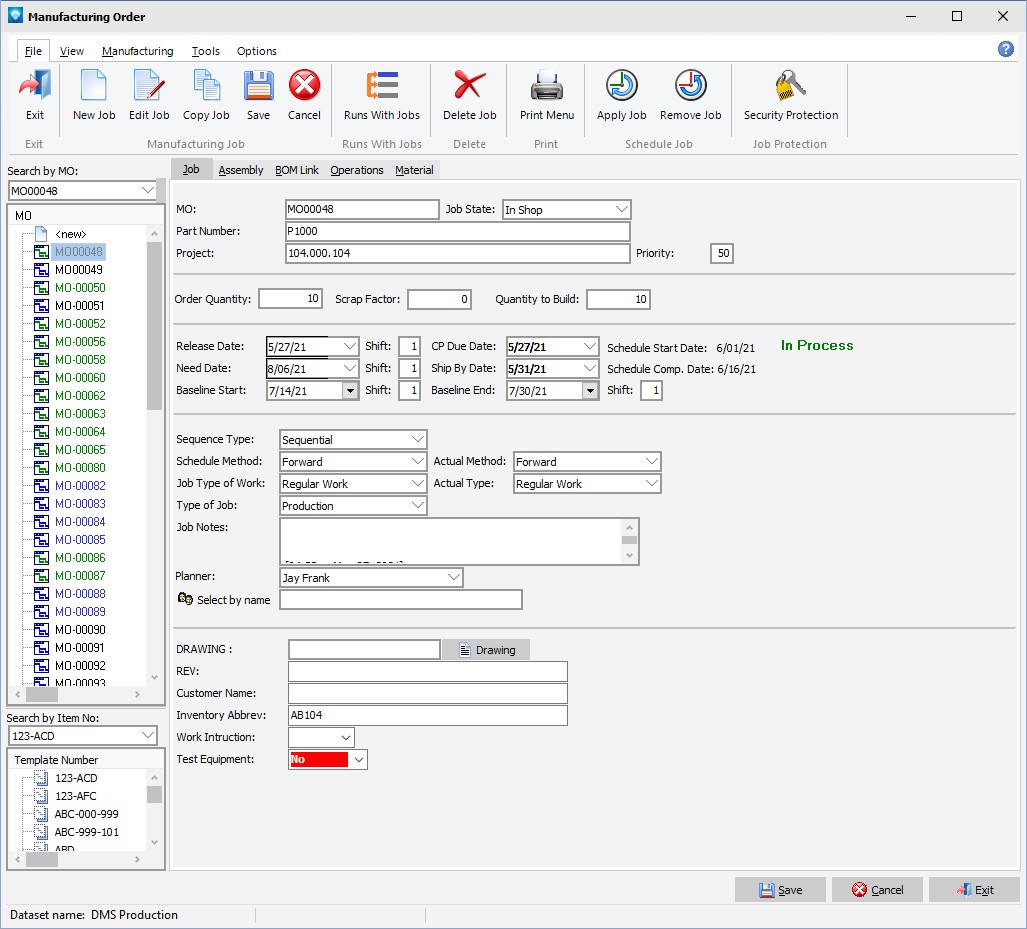
The Job tab in Manufacturing Order contains all the job details such as job identification, part number, job dates, job quantities, etc. The appearance of the job tab and the prompts will depend on what terms you have changed, which fields (if any) you have hidden, and if you have any user fields. Terms and Settings is where you set the terms and whether or not a field is hidden.
The following is an example of Manufacturing Order Job tab. In the example, Order Number has been renamed to MO, and Job Identification has been renamed to Project. Also, user fields have been defined and they appear below the line after the Planner prompt.
If you right click on the job tree, the following pop up menu appears. The appearance of pop up menu will depend on the selections you have made in Terms and Settings as well as Material Options:

From this menu you can:
The following explanation of the prompts on the job tab assume that there are not any hidden fields and that standard DMS names are used. (For information on the screen layout, see the Job Tab Screen.) Note that template jobs have different prompts for dates then jobs with other job states. For template job differences, see the information below on Template Job Prompts.
Template jobs have the same prompts as jobs with other job states except that the dates listed above are replaced by the following:
Template jobs must have unique Part Number; no two template jobs may have the same part number.
The example below shows a template job. Note that the date section of the screen is different from the date section of a non-template job. All other information is the same. A template job is usually planned for one piece and does not have its material information completed (i.e. Material Available is not selected and the expected delivery and date received are blank) with the exception of the Days to delay job which may be a standard number of days for the template job. User fields are filled in as required for a template job:
