Manufacturing Order Job Details is where you describe each job and its operations in detail. You can also relate jobs to each other in an assembly structure or in a job link structure called a BOM link.
To access Manufacturing Order (job details), perform one of the following commands from Manufacturing menu:
- Select File | New to add a new job.
- Select File | Edit to edit the existing highlighted job. If the Manufacturing Orders (multiple jobs) edit grid button is Edit Off, then by double clicking on a job, you can gain access to Manufacturing Order (job details) to edit that job.
Only those jobs that are in the Manufacturing Orders Job Grid will be accessible by Manufacturing Order (jobs details) with the exception of template jobs which, if used, will be displayed in the template tree. The process of displaying only those jobs in the Manufacturing Orders Job Grid enables you to select a subset of data to work with.
Below is an example of the opening screen of Manufacturing Order with all the job options being displayed and without any user fields. The Job Tree can be widened or thinned by using the mouse on the right side of the Job Tree and drag the tree to show more or less information as per the setting in the job tree options. If the Template Tree is displayed, you can increase or decrease the height of the template tree by using the mouse on the bar between the job tree and template tree and drag the tree to increase or decrease the height of the template tree.
The Job Tree and Template Tree can be searched by either clicking on the tree and then entering the text you want to search for all at once, or by selecting the drop down box at the top of each tree. The Job Tree Search by Order Number drop down menu displays jobs sorted by Order Number and includes the Order Number, Part Number (Item Number), and Job Identification. The Template Tree Search by Item No drop down menu displays jobs sorted by Item Number (Part Number) and includes the Item Number (Part Number), and Job Identification. The corresponding job in the tree will display the job in the tree after the user presses enter or tab, or leaves the search prompt to move to another prompt. Note that the job details are not displayed until the user clicks the job in the tree. Also note that the search will look for only those jobs displayed in the job tree and not hidden components of an assembly. To search for assembly components, use the right mouse click on the Job Tree and select Expand All, to expand all assembly trees, and then perform the search. The jobs listed in the Job Tree search drop down are the same jobs listed in the Manufacturing Orders Job Grid. That is, the same SQL search applies to the Job Tree search.
Manufacturing Order screen example:
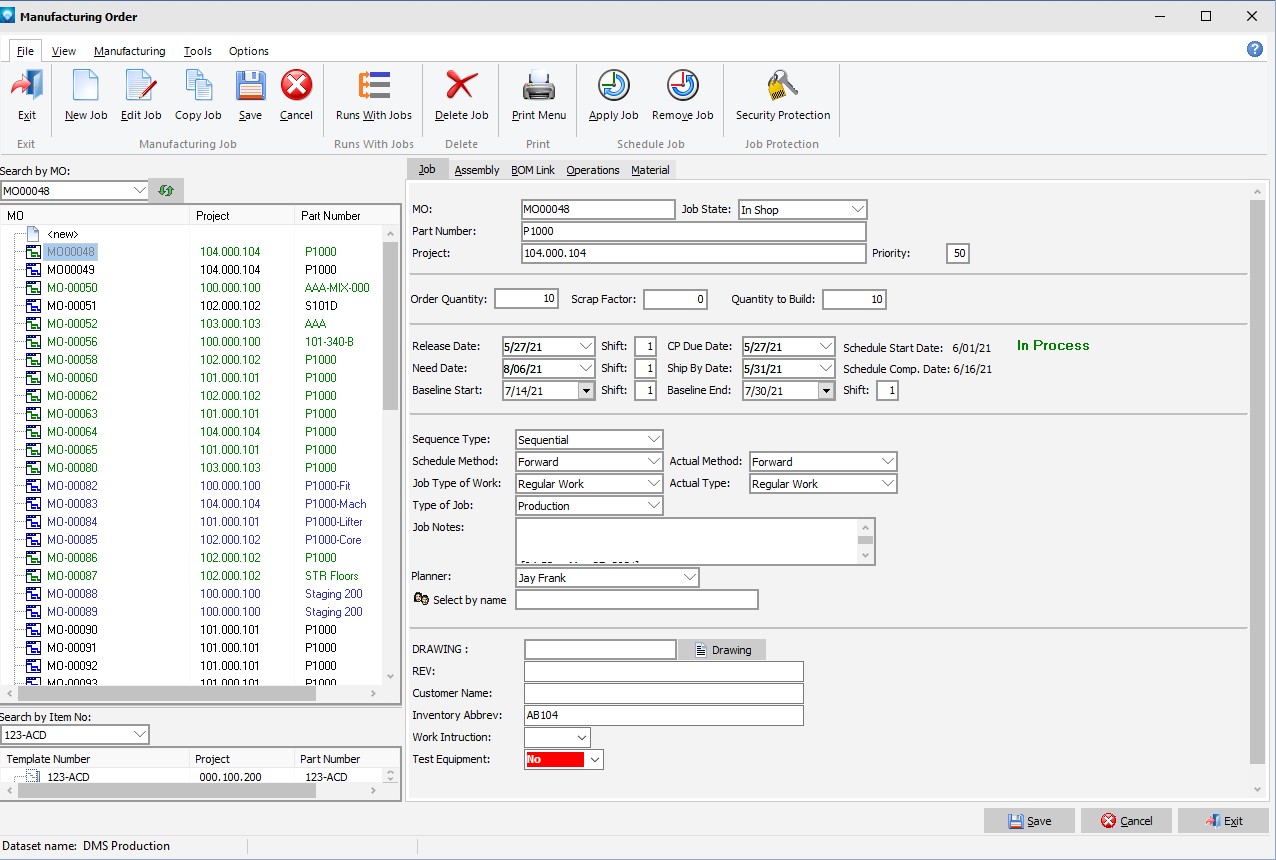
The following tabs and commands are available from the Manufacturing Order screen:
File
- New Job to add a new job.
- Edit Job to edit the highlighted job in the job tree, or double click on a job in the job tree to edit that job.
- Copy Job to copy the currently highlighted job. You can use the copy command to copy a template job to a job with a different job state and vice versa. (See Manufacturing Order Options for options on copying jobs.)
- Save to save the job header information.
- Cancel to cancel a new or edited job.
- Runs With Jobs enables setting up a Runs With Job Group. Select the job to be a runs with job and either select File | Runs With Jobs or right click on the Job Tree and select Runs With Jobs from the popup menu.
- Delete Job to delete the current job.
- Print Menu to print a DMS Report as setup by Module Report Settings.
- Apply Job to apply the currently highlighted job onto the existing schedule. To apply a job to the existing schedule, the job state must be of a schedule type and the job cannot already be scheduled.
- Remove Job to remove the currently highlighted job from the existing schedule. To remove a job from the schedule, the job must already be scheduled and have valid schedule dates.
- Security Protection to set the security level for the job.
View
- Job Tree to setup the job tree appearance, what information you want in the job tree, and whether or not to show the template tree.
- Assembly Grid Columns
- Operation Grid Columns
- Material Grid Columns
- Total Hours Operations Columns
- Assembly Search Footer Toggle this button on or off. When on, a prompt will appear at the bottom left side of the Assembly grid enabling you to search the gird for the entered text. If off, the search footer prompt does not appear.
- Operations Search Footer Toggle this button on or off. When on, a prompt will appear at the bottom left side of the Operations grid enabling you to search the gird for the entered text. If off, the search footer prompt does not appear.
- Material Search Footer Toggle this button on or off. When on, a prompt will appear at the bottom left side of the Material grid enabling you to search the gird for the entered text. If off, the search footer prompt does not appear.
Manufacturing
- New Job to add a new job.
- Edit Job to edit the highlighted job in the job tree, or double click on a job in the job tree to edit that job.
- Calendar/Capacity Changes are changes you want to make to the manufacturing calendar such as holidays, planned overtime, planned shut downs, etc.
- Resources is used to add, edit, delete resource settings.
- Schedule Run Run a global schedule.
- Job Updating is used to manually enter detailed time updates to a job.
- Start/Stop Clock The Start/Stop Clock Updating is an alternate method to to update a job with times and quantities typically used by a timekeeper or shop floor personnel.
- Start/Stop Clock Edit If using Start/Stop Clock Updating, the Edit Start/Stop Clock Job Updating enables an authorized user to edit existing start/stop clock entries.
- Quick Updating Quick Job Updating is a fast way to update a job with times and quantities without all the displayed details used in Job Updating..
Tools
- Lock Dates to lock the currently highlighted job's operation dates onto their existing schedule dates.
- Unlock Dates to unlock the currently highlighted job's operation dates.
- Material Available If you are using Material Requirements this command will set all of the job, operations, and material details "available" flag to selected.
- Material Unavailable If you are using Material Requirements this command will set all of the job, operations, and material details "available" flag to be unselected.
- Delete Job's Requirements (material) to delete all the current job's material requirements.
Options
- Manufacturing Jobs Options
Manufacturing Order Job Details Tabs
Manufacturing Order Job Details has up to five tabs of information depending on the options selected in Terms & Settings:
- Job tab
- Job Multi Template tab
- Assembly tab
- BOM Link tab
- Operations tab
- Material Details tab
Note that if External Database Displays have been added to DMS, these tabs will appear after the last tab.

